Instagram reduces the size of photos and videos to save data and load content faster. Because of this, many posts lose sharpness after being uploaded. If your pictures or videos look less clear than the originals, there is a simple setting you should turn on. Instagram offers a high quality upload option that helps keep your content looking clean and detailed.
This article explains what that setting does, how to enable it, and when it actually makes a difference.
Also read: How to Change Your Instagram Password on Phone or Computer
What High Quality Uploads Mean on Instagram
When high quality uploads are turned on, Instagram processes your media at a higher level. The app uses more data during upload, which helps reduce heavy compression. As a result, photos look clearer and videos keep more detail.
This option is useful if you often share:
- Reels
- Sharp, high-resolution images
- Videos with fine details
- Content for business or creator accounts
How to Enable High Quality Uploads
You can turn on this setting in just a few steps. The process is the same on Android and iPhone.
- Open the Instagram app
- Go to your profile page
- Tap the menu icon in the top corner
- Open Settings and privacy
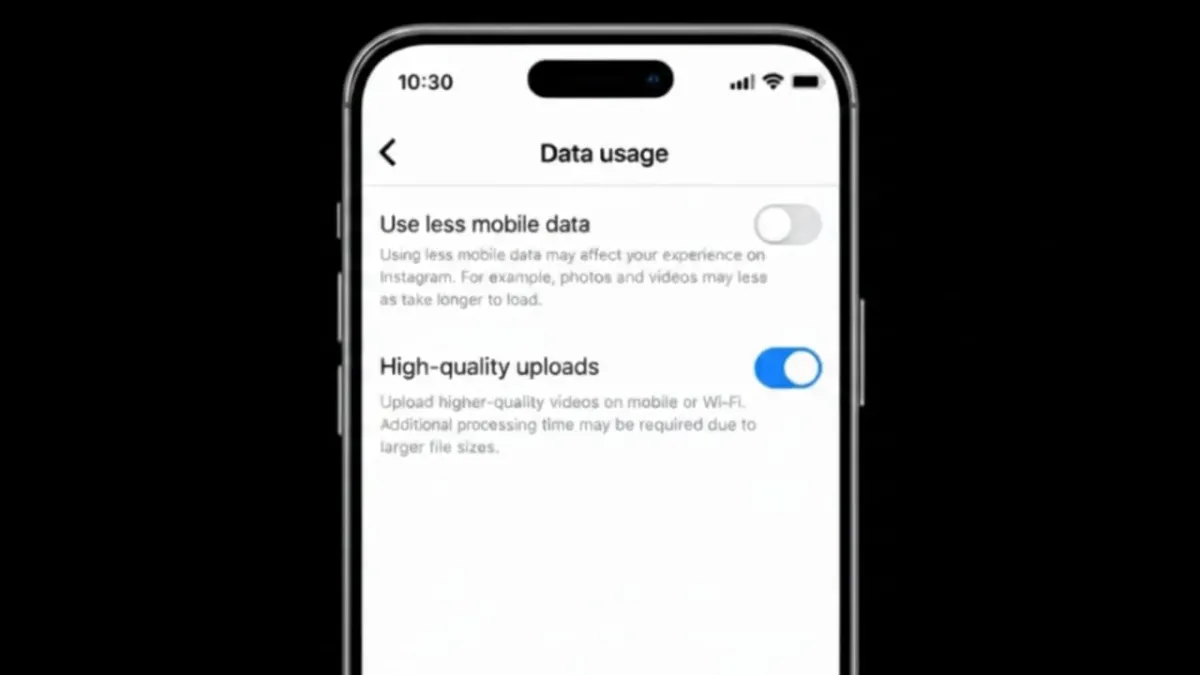
- Find Data usage and media quality
- Enable Upload at highest quality
After this, Instagram will upload your photos and videos in better quality whenever you post.
Does This Setting Use More Data?
Yes, it does. High quality uploads need more internet data than standard uploads. If you are on a limited mobile plan, it’s best to upload while connected to Wi-Fi.
Even with this option on, Instagram may still compress files slightly. However, the difference in clarity is usually noticeable.
When High Quality Uploads Give the Best Results
This feature works best when:
- Your internet connection is stable
- The original file is already high resolution
- You upload directly from your camera gallery
- The video or photo is properly framed and lit
Low-quality or poorly lit files won’t improve much, even with this setting enabled.
Why Uploads May Still Look Blurry
If your content doesn’t look sharp after uploading, check these common issues:
- The original video or photo is low resolution
- The aspect ratio is not supported by Instagram
- The file size is too small
- The upload was interrupted by weak internet
Fixing these problems along with enabling high quality uploads usually improves the final result.
Should You Leave High Quality Uploads On?
If visual clarity matters to you, keeping it on is a good idea. Creators, brands, and users who post often will benefit the most. If you post only once in a while, you can turn it on only when needed.
Also read: How to Check Which Email Is Connected to Your Instagram Account
Final Thoughts
Turning on high quality uploads is one of the easiest ways to make your Instagram content look better. The option is hidden in the data settings, so many people never notice it. Once enabled, your photos and videos appear sharper and more polished, especially on larger screens.
If you want your posts to look clean and professional, this setting is worth using.

Abhi Rajput, founder of EarnAbhi.in, is a tech lover with 6+ years of experience in SEO, digital tools, and smartphone troubleshooting. He writes simple, clear, and useful guides to help people solve real tech problems.