If you often hand your phone to friends or family, you may worry that someone might accidentally see a private photo. The good news is that your iPhone already includes reliable tools to keep personal images out of sight. With built-in features like the Hidden album, Face ID, and Touch ID, you can quickly secure anything you don’t want in your main gallery.
This guide walks you through each method step by step, so even a first-time iPhone user can follow along with ease.
Also read: Google Maps Introduces Power-Saving Mode for Pixel 10 Users
Hide Photos Using the Built-In Hidden Album
The easiest way to protect private images is by using the Hidden album inside the Photos app. This special folder removes your selected pictures from the regular photo feed and stores them in a separate, protected area.
Many people use this feature to hide personal moments, important documents, surprise plans, or anything they prefer to keep discreet.
How to Hide Photos
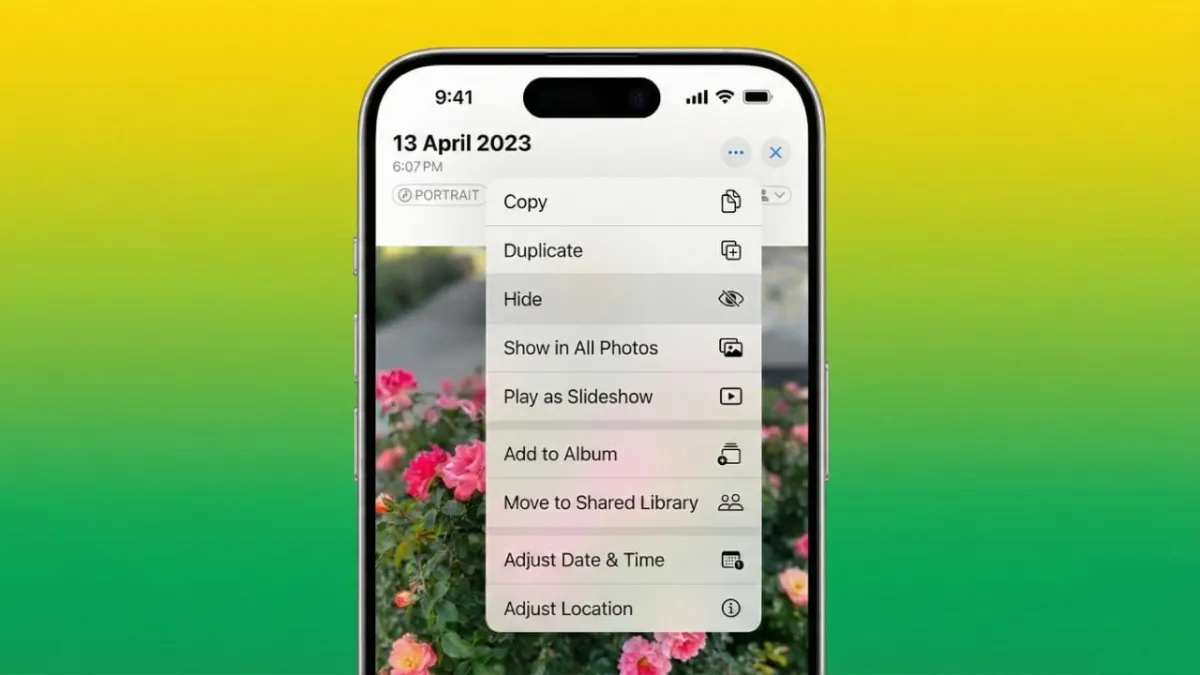
- Open the Photos app.
- Tap Select and choose the photos or videos you want to hide.
- Press the three-dot menu (More Options).
- Pick Hide and confirm.
Your selected files will instantly move to the Hidden album.
Show or Hide the Hidden Album
You can decide whether the Hidden album appears in your library:
- Open Settings.
- Scroll to Photos.
- Toggle Show Hidden Album on or off.
On iPhones running iOS 16 or later, even if the album is visible, it stays locked behind Face ID or Touch ID. Older versions hide the album entirely when this switch is turned off.
Opening the Hidden Album
- Go to the Albums tab in Photos.
- Scroll to the Utilities section.
- Tap Hidden.
- Unlock it with Face ID, Touch ID, or your passcode.
You can restore any photo to your main gallery at any time. The album locks again as soon as you exit it, keeping your content protected automatically.
Extra Ways to Strengthen Photo Privacy on iPhone
If you want more control or an additional layer of security, iPhone offers a few other helpful options.
1. Turn On Biometric Protection for Hidden Content
In Settings > Photos, enable Use Face ID or Use Touch ID.
This ensures that only you can open the Hidden or Recently Deleted albums, adding an extra level of security.
2. Lock Photos Inside the Notes App
For users who prefer password-based protection, the Notes app is a great alternative.
Here’s how:
- Create a new note.
- Insert the photo using the Add button.
- Tap the Share icon.
- Select Lock Note.
You can unlock it with a password, Face ID, or Touch ID. This method is helpful when you want a more controlled, password-style lock for sensitive images.
3. Lock the Entire Photos App (iOS 18 and Later)
On newer versions of iOS, you can protect the whole Photos app:
- Press and hold the Photos app icon.
- Choose the option to require Face ID for opening the app.
- Confirm your choice using your usual unlock method.
From that point on, anyone trying to open Photos will need your biometric authentication. You can remove this lock at any time using the same steps.
Also read: How to Add Multiple Accounts to Google Pay: A Simple Guide for Everyone
Final Thoughts
Keeping private photos secure on an iPhone is easier than most people think. The Hidden album offers a quick and convenient way to remove personal images from your main gallery, while Face ID or Touch ID adds an immediate layer of safety.
If you want stronger protection, you can use locked notes or even lock the Photos app itself on supported iPhones. These simple tools help you safeguard personal moments, documents, and memories wherever you go.

Abhi Rajput, founder of EarnAbhi.in, is a tech lover with 6+ years of experience in SEO, digital tools, and smartphone troubleshooting. He writes simple, clear, and useful guides to help people solve real tech problems.