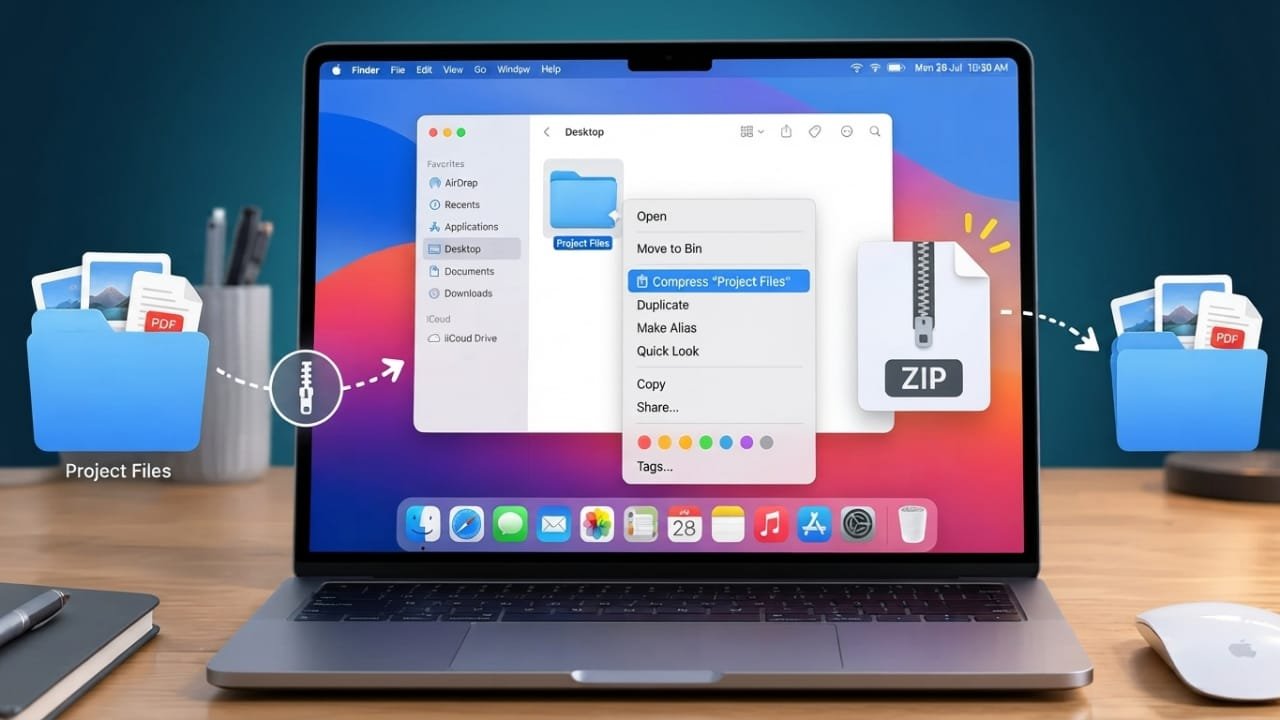
ZIP files are a simple way to bundle files together, reduce their size, and make them easier to store or share. The good news is that macOS already includes built-in tools for working with ZIP archives, so you usually don’t need to install another application.
Advertisements
Whether you’re new to Mac or simply want to learn a faster way to manage files, you can create and extract ZIP archives using Finder, Archive Utility, or Terminal. Here’s how each method works.
Also read: How to Fix iTunes Connection Error 3259: A Simple Troubleshooting Guide
What Is a ZIP File on Mac?
A ZIP file is an archive that can contain one or more files and folders. When you compress an item, macOS creates a new file with the .zip extension.
For example, if you compress a folder called Photos, you may get a file named Photos.zip.
ZIP compression can make files smaller, although the amount of space saved depends on the type of files you’re compressing. Files that are already compressed, such as many images, videos, and some documents, may not become much smaller.
Another useful feature is that several files can be placed inside a single ZIP archive. This makes it easier to share a group of files without sending each item separately.
Why Use ZIP Files?
There are several practical reasons to compress files on a Mac:
- Combine multiple files: Keep related files inside one archive.
- Make sharing easier: Send one ZIP file instead of several individual files.
- Reduce file size: Some types of files can become smaller after compression.
- Keep folder organization: Files and subfolders remain arranged inside the archive.
- Create convenient backups: A collection of related files can be stored as one archive.
Keep in mind that ZIP compression doesn’t guarantee a major reduction in size. The result depends largely on what’s inside the archive.
How to Zip Files Using Finder
For most Mac users, Finder is the easiest way to create a ZIP file. You don’t need to open Terminal or install anything.
Steps to Create a ZIP File
- Open Finder on your Mac.
- Navigate to the file or folder you want to compress.
- Control-click the item, or right-click it.
- Select Compress from the menu.
- macOS will create a ZIP file in the same location.
If you compress a single file or folder, macOS generally uses its original name for the ZIP archive.
When you select several items at once, macOS may create an archive named Archive.zip. You can rename the ZIP file just like any other file.
Your original files aren’t deleted or changed when you create the archive.
How to Zip Multiple Files
You can also put several files into one ZIP archive.
Select the files you want in Finder while holding the appropriate selection key, then right-click the selected items and choose Compress.
macOS will create one ZIP archive containing the selected files.
How to Unzip a File on Mac
Opening a ZIP file is even simpler than creating one.
- Find the
.zipfile in Finder. - Double-click the archive.
- macOS will automatically extract its contents.
The extracted files will normally appear in the same location as the ZIP archive.
For example, if Project.zip is stored in your Downloads folder, macOS will extract its contents there.
The original ZIP file remains in place unless you manually delete it.
How to Use Archive Utility on Mac
Archive Utility is a built-in macOS application responsible for handling common archive operations. Finder uses it behind the scenes when you compress or extract ZIP files.
You normally don’t need to open Archive Utility yourself, but it can also be used directly.
Compress a File With Archive Utility
- Open Archive Utility on your Mac.
- Locate the file or folder you want to compress.
- Drag the item onto the Archive Utility application.
- macOS will create a ZIP archive.
The resulting archive is generally placed in the same location as the original item.
Extract a ZIP With Archive Utility
You can also drag a ZIP archive onto Archive Utility.
The application will process the archive and extract its contents, usually into the same folder where the ZIP file is located.
For everyday use, however, double-clicking a ZIP file in Finder is usually quicker.
How to Zip Files Using Terminal
Terminal is useful when you want more control over the compression process or need to perform the same task repeatedly.
Create a ZIP Archive With Terminal
First, open Terminal from Applications or Spotlight.
Use the cd command to move to the folder containing the item you want to compress. You can also drag a folder into the Terminal window to insert its path.
For example:
cd /path/to/folder
Then use the zip command.
To compress a folder and everything inside it:
zip -r ArchiveName.zip FolderName
Replace ArchiveName.zip with the name you want for the ZIP file and FolderName with the folder you want to compress.
The -r option tells zip to include the folder’s contents and subfolders.
Example
If your folder is called ProjectFiles and you want the archive to be called ProjectBackup.zip, you can use:
zip -r ProjectBackup.zip ProjectFiles
The ZIP archive will be created in your current Terminal directory.
How to Unzip Files Using Terminal
Terminal can also extract ZIP archives.
First, move to the directory containing the archive:
cd /path/to/folder
Then run:
unzip ArchiveName.zip
Replace ArchiveName.zip with the actual name of your archive.
The contents will be extracted into the current directory.
What Happens if Files Already Exist?
If the archive contains files that already exist in the destination folder, unzip may ask what you want to do.
Depending on the prompt, you may be able to overwrite an existing file, skip it, overwrite multiple files, or rename the extracted version.
If you’re unsure, avoid overwriting existing files until you’ve confirmed that doing so won’t remove changes you want to keep.
How to Create a Password-Protected ZIP File
If you want to protect the contents of a ZIP archive with a password, Terminal can create an encrypted archive.
Open Terminal and move to the directory containing the folder you want to compress:
cd /path/to/folder
Then use:
zip -er ProtectedArchive.zip FolderName
Replace ProtectedArchive.zip with your preferred archive name and FolderName with the folder you want to compress.
Terminal will ask you to enter a password. Enter it when prompted and press Return.
Because Terminal doesn’t display the password while you type, don’t be concerned if nothing appears on screen.
Keep Your Password Safe
A password-protected ZIP is only useful if you can remember or securely store the password. If you lose the password, recovering the contents may not be straightforward.
Also, ZIP encryption has compatibility differences between tools and operating systems. If you’re sharing an encrypted archive with someone else, make sure their software supports the type of encrypted ZIP you’re creating.
Which Method Should You Use?
For most people, Finder is the best option because it’s quick and doesn’t require commands.
Here’s a simple comparison:
| Method | Best For |
|---|---|
| Finder | Everyday ZIP and extraction tasks |
| Archive Utility | Built-in archive management |
| Terminal | Advanced users and automation |
| Password-protected ZIP | Sharing archives that need an added layer of protection |
If you’re simply trying to send several files to someone, Finder is usually all you need.
Also read: How to Customize the Mac Finder Sidebar: A Simple Guide
Final Thoughts
Creating and opening ZIP files on a Mac is straightforward because macOS already provides the necessary tools. Finder handles basic compression and extraction, while Archive Utility works in the background and Terminal provides additional control for users who need it.
For everyday tasks, right-clicking an item and choosing Compress is probably the quickest approach. When you need more control, Terminal commands such as zip, zip -r, and unzip can be useful.
Once you get familiar with these options, managing ZIP archives on your Mac becomes a quick and routine part of working with files.

Abhi Rajput, founder of EarnAbhi.in, is a tech lover with 6+ years of experience in SEO, digital tools, and smartphone troubleshooting. He writes simple, clear, and useful guides to help people solve real tech problems.
Advertisements