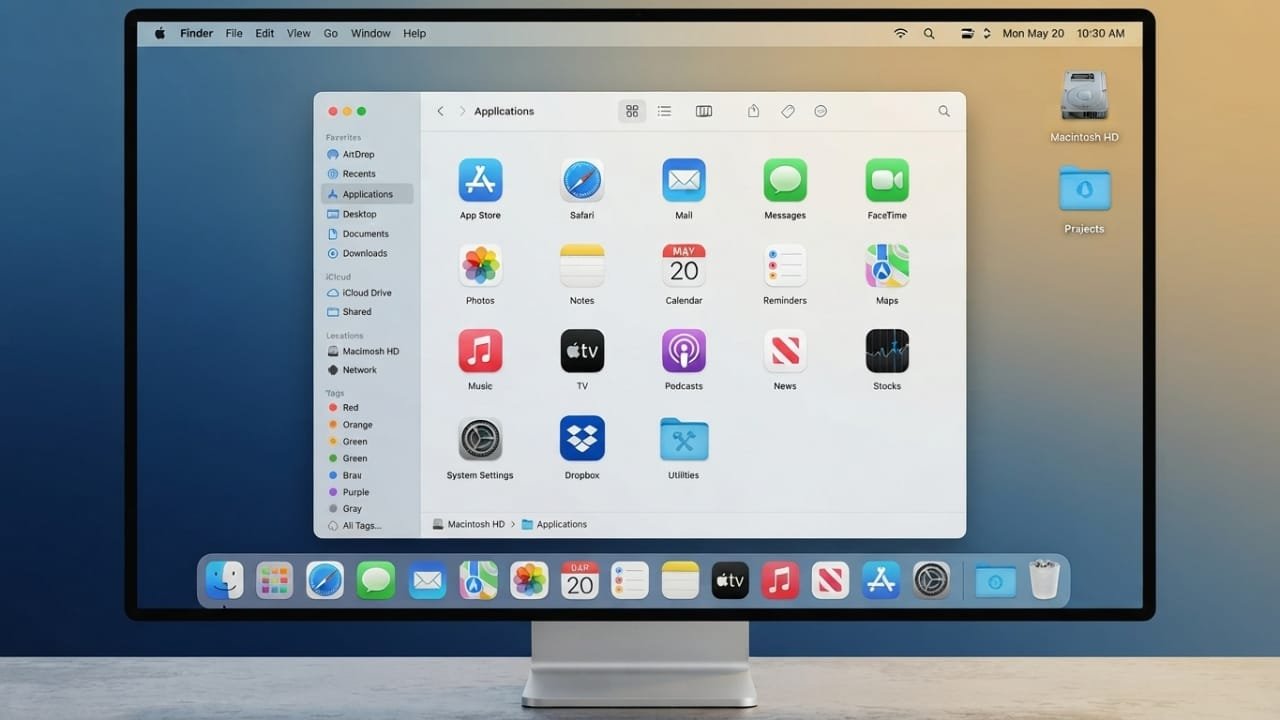
Removing Dropbox from a Mac is more than moving the app to the Trash. The main application can be deleted that way, but some supporting files may remain in macOS folders.
Advertisements
If you no longer use Dropbox, removing those extra files can help keep your Mac organized. Before starting, however, make sure any important files stored in your Dropbox folder are backed up or safely available online.
Also read: How to Turn Off Double Tap on Apple WatchWhat to Know Before Uninstalling Dropbox
Uninstalling Dropbox removes the application from your Mac, but it does not automatically close or delete your Dropbox account.
If you are moving to another cloud storage service, such as iCloud, Google Drive, or OneDrive, check that your important files have finished syncing before removing the application.
It is also worth checking whether Dropbox is still running in the background. Closing the app first makes the removal process smoother.
How to Prepare Your Mac
Before deleting Dropbox, sign out of your account and quit the application.
- Click the Dropbox icon in the Mac menu bar.
- Open your Dropbox settings or preferences.
- Go to the account section.
- Sign out of Dropbox if the option is available.
- Quit Dropbox completely.
If Dropbox does not close normally, you can check Activity Monitor.
Open Activity Monitor using Spotlight and search for Dropbox-related processes. If Dropbox is still running, select the relevant process and use the stop button to close it.
Remove Dropbox From Applications
Once Dropbox has been closed, you can remove the main application.
- Open Finder.
- Select Applications from the sidebar.
- Find Dropbox.
- Drag the application to the Trash.
- Enter your Mac password if macOS asks for permission.
At this point, the main Dropbox application has been removed. However, some supporting files may still be stored elsewhere.
Find and Remove Dropbox Leftovers
macOS keeps application-related data in several Library folders. Depending on your Mac and the Dropbox version you used, some Dropbox files may remain in these locations.
To open your user Library:
- Open Finder.
- Click Go in the menu bar.
- Hold the Option key.
- Select Library when it appears.
You can then check folders such as:
- Application Support
- Caches
- Preferences
- Saved Application State
- Logs
- Containers
- Group Containers
- Application Scripts
- LaunchAgents
Look specifically for files or folders that are clearly associated with Dropbox.
You may also find a folder named .dropbox. Hidden folders like this are not visible in the normal Finder view, so only remove them if you are certain they belong to Dropbox.
Check the System Library
Some Dropbox components may also be stored in the main system Library.
In Finder, select Go > Go to Folder and enter:
/Library
Look for Dropbox-related components or helper files. Depending on your macOS version and Dropbox installation, these files may not exist.
For example, some older Mac setups may contain Dropbox helper components or extensions. Do not delete a system file simply because its name is unfamiliar. Only remove an item when you can clearly identify it as belonging to Dropbox.
Check Finder Extensions and Login Items
Dropbox can integrate with Finder and macOS background services. If Dropbox still appears in system settings after uninstalling the app, check your extensions and login settings.
On newer versions of macOS, open:
System Settings > General > Login Items & Extensions
Review the available entries and disable any Dropbox-related extension or background item that is still present.
The exact options can vary depending on your macOS version.
Delete the Local Dropbox Folder
Removing the Dropbox application does not necessarily remove the Dropbox folder containing your synced files.
Before deleting this folder, check its contents carefully.
Open your home folder by pressing:
Command + Shift + H
Find the Dropbox folder and review the files inside it.
Do not delete the folder until you have confirmed that important documents, photos, or other files are safely backed up or available through your Dropbox account.
If you have already moved your files to another cloud service, make sure the transfer has completed before removing the local copy.
Empty the Trash and Restart Your Mac
After removing the application and any confirmed Dropbox leftovers, empty the Trash.
Then restart your Mac.
A restart can help close remaining background processes and refresh Finder and other macOS services.
After the restart, check your Applications folder and system settings to make sure Dropbox is no longer installed or running.
Should You Use a Mac Uninstaller?
Manual removal works, but finding application leftovers can take time. A reputable Mac uninstaller can scan for files associated with an application and make the process more convenient.
If you decide to use one, review the files it identifies before deleting them. Avoid removing anything that you cannot confidently associate with Dropbox.
Automatic cleanup tools can be useful, but they are not required to uninstall Dropbox. You can remove the application manually using Finder and clean up its remaining files yourself.
Does Uninstalling Dropbox Delete Your Account?
No. Removing the Dropbox application from your Mac does not normally delete your Dropbox account.
Your online account and files stored in the cloud are separate from the application installed on your computer.
The important thing to remember is that deleting a local Dropbox folder can have different consequences depending on how the files are synced and managed. Always check your files and backups before deleting anything important.
Also read: How to Use Math Notes on iPad: Step-by-Step Guide
Final Thoughts
Uninstalling Dropbox from a Mac is straightforward once you know where to look. Start by signing out and quitting Dropbox, remove the application from the Applications folder, and then check the Library for leftover Dropbox-related files.
Most importantly, protect your files before deleting the local Dropbox folder. If you are switching to another cloud storage service, wait until your important data has been successfully transferred or backed up.
Taking a few extra minutes to check your files can help you avoid accidentally removing something you still need.

Abhi Rajput, founder of EarnAbhi.in, is a tech lover with 6+ years of experience in SEO, digital tools, and smartphone troubleshooting. He writes simple, clear, and useful guides to help people solve real tech problems.
Advertisements